People constantly think that their dishwasher isn’t working because they perpetually pull out less-than-clean dishes. They assume that there must be a faulty mechanism somewhere inside the machine, and call a serviceperson out to take a look. An hour later, and a few hundred dollars shorter, the trip has pretty much amounted to nothing. This is all because people don’t know how to properly load their dishwasher. This blog is designed to combat that.
Step One
The first step to proper dishwasher loading, of course this comes after the machine’s been emptied, is to remove any relatively large food items from each and every piece of dirty dishes. People assume that the dishwasher is here to replace the entire act of handwashing. Not so. You still have to get large chunks of excess food off of the dishes first. There really isn’t anywhere for it to go inside the machine, and it’ll splatter onto the other dishes. No, you do NOT have a built in disposal no matter what the salesperson told you. You MAY have a built in grinder for small debris depending on the model.
Step Two
As you begin to load dishes in, keep an eye out for small pieces of food that may be baked onto the dish. If it’s been sitting in the sink for any significant amount of time, even small particles of food could be completely stuck to the plate or bowl. Put some real elbow grease into it, as the dishwasher may not be able to completely remove it. The last thing you’ll want to do is have to scrape off further baked on specs of grossness after the wash is completed. Trust us on this one.
Step Three
Give the dirty dishes a quick little pre-rinse. Again, we aren’t saying to do the entire job of the dishwasher ahead of time, just give all of the dishes a kind little spray of water before you load them in. Think of this as priming the dishes, if you will. It’ll be much easier for the dishwasher to tackle the gunk on the dishes if they’ve already been hit with some water. We’ll emphasize again, you’re not doing any washing yourself right here. Just a little splash of water on all the dirty dishes. In fact, its actually better for the dishes to be dirty rather than a thorough rinse so the soap works properly. We will cover Dishwashing soap and drying process on a future Blog.
Step Four
If you can’t scrape something off with a cleaning brush, the dishwasher won’t be able to either. This pretty much pertains to pots and pans specifically. The high-intensity heat from cooking can seemingly turn food left in the pan to stone. Your best bet is to scrape that stuff off as best you can before the wash.
Step Five
Keep an eye out after washes for what will and won’t come off in your typical dishwashing cycle. That way you can determine for what really needs to be tackled ahead of time, versus what the dishwasher can take care of. Basically, make sure you’re not creating more work for yourself if your dishwasher is a real hoss. On the other hand, don’t fall victim to the same substances sticking to your dishes after the wash every single time. That will be extremely frustrating.
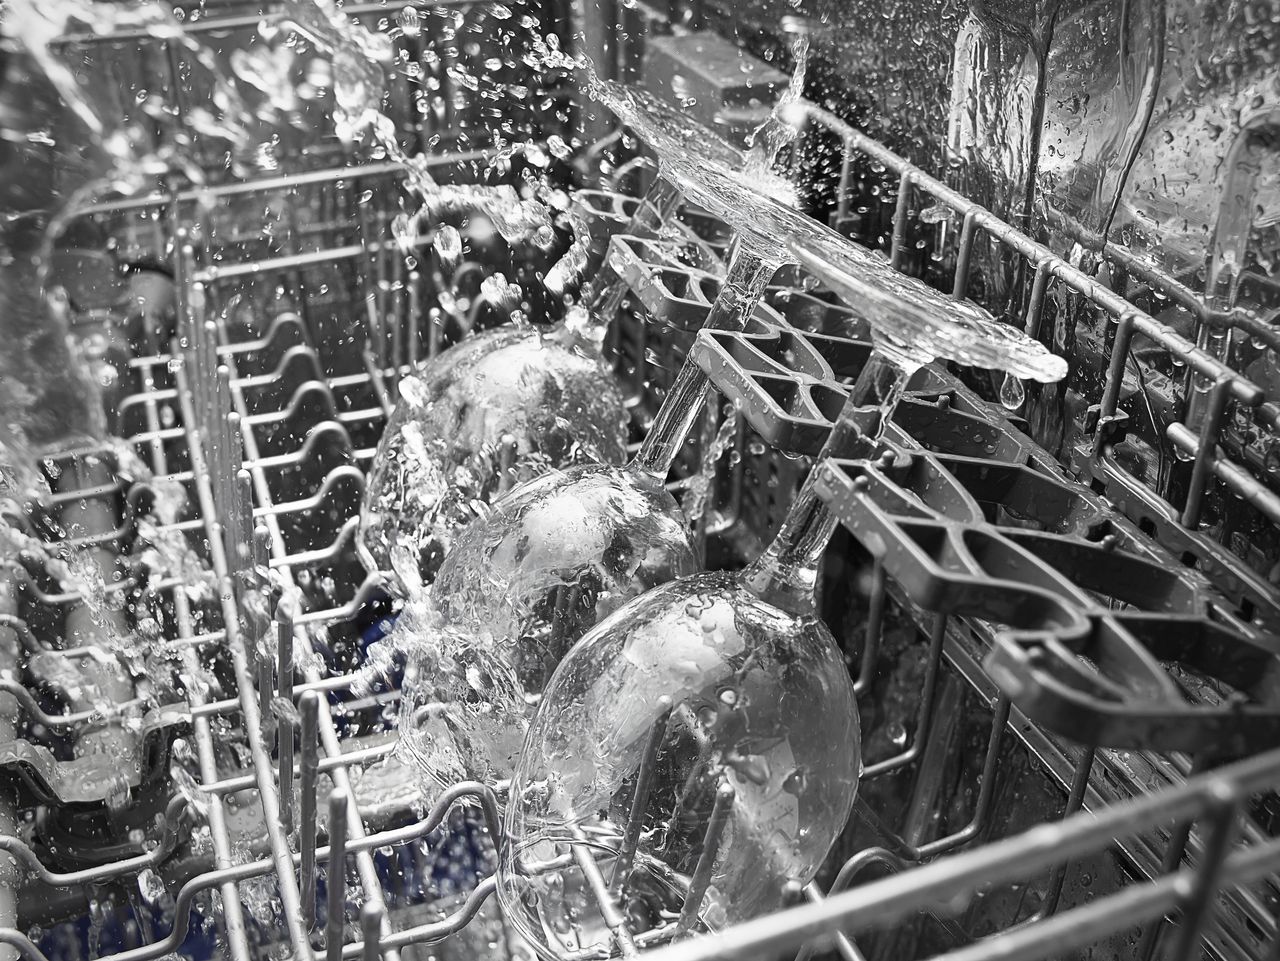
Step Six: The Actual Wash!
This is where things get specific. Far too many people just put dishes wherever they’ll fit, rather than putting them where they will be most efficiently cleaned. So, we’ll run down a short list of items and their ideal location.
- Silverware always goes in their designated slots. This one is a no brainer, but here’s the kicker: the stem end always goes down, the cutlery end always stays up. The fork prongs, spoon scoop, and knife blades should always be on top. That’s the hardest end to clean, and the one that goes in the mouth. It needs to be the cleanest. Also: long grilling and cooking utensils should always be laid flat on the top rack. Just be careful when pulling those knives back out after the wash!
- Plates always go next to each other on the bottom rack. Make sure there is enough space for the soap and water to dance around in between each plate, otherwise only the first and last plates will be clean.
- Bowls and cups are relegated to the top rack, with their opening facing down. Do your best to make sure they are as flat as possible. Laying a bowl on its side will get it marginally clean, but dirty water will pool up in its bottom, which is gross and unsanitary, defeating the entire purpose.
- Plastic containers, like Tupperware, should also be on the top rack. The high-heat of the water during the wash cycle, and the hot steam of the drying will likely warp any of those plastic containers if they find themselves on the bottom. Additionally, your plastic items will likely still be wet since the plastic doesn’t retain the heat that helps the drying process like glass and ceramic does. Again, we will cover this more on a future blog.
- Lastly, pots and pans go on the bottom rack, with the same rules as the cups and plates. Lay them flat. Don’t be afraid to need a second load of dishes. Ask yourself this question: Would you rather run one load and have most of your dishes unsatisfyingly clean, or would you rather run two loads and have your dishes be spotless? If you’re like us, you’ll say spotless.
We sincerely hope that this cleared up any issues with your dishwasher’s effectiveness. If you still believe there is a problem with the machine, feel free to call Guinco Service at 844.3.GUINCO, or visit us online at Guinco.com. Thank you for letting our family help yours!
